-
Hmm it depends. It depends on ***HOW*** you remaster your ISO using the flash disk installation. If one does it the correct way, it is possible to remaster the new ISO to make it smaller ( ie
leave out the deleted files).
Have you a script example, how to do this?
-
Senior Member
registered user

Originally Posted by
Werner P. Schulz

Have you a script example, how to do this?
http://www.knoppix.net/forum/threads...allation/page2
Forester who has disappeared from this forum has written a few scripts on this. I must admit that I haven't tried any of his scripts and I also don't really know which is the latest and best, but I believe he has gotten the essence of flash remaster, which is to clean up the wiped-out files.
My original post requires a huge disk space to be allocated for the remaster. But I believe he took the idea one step further, he probably remaster based on the structure of flash installation.
-
Well now Im totally lost! The link I followed previously for remaster didnt work. The ISO wasnt created in a useable state. The ISO was 11Mb and seemed to be a corrupt file. Per statement from Schulz, "... you can combine: 1. remaster Knoppix 2. "Flash disk Installation" of remastered Knoppix"
So which is it? Is Flash disk and remaster not combined? My Flash Disk install is pretty much customized to what I need. Now that was a waste of time if I cant make an ISO of it.
-
Senior Member
registered user

Originally Posted by
Capricorny

There are actually several rather different methods working. My (and some others') preferred way is to
1. Copy the compressed KNOPPIX image plus the persistent image to harddisk
2. aufs-mount them like in a running KNOPPIX instance
3. "unwrap" the /UNIONFS file system by copying (rsyncing) most of it to a remastering directory.
4. Do some minor modifications, like copy /home and /var over to a new persistent image, and copy the original Knoppix versions of these directories to the file system to compress.
5. Create isofs from the remastering directory, and compress that to a new cloop image. Squashfs is a good alternative to cloop, but requires modification of minirt.gz
6. Create new persistent image from /home and /var.
7. Copy the new versions of KNOPPIX(.sq) and knoppix-data.img into an existing KNOPPIX directory, and test run that in qemu. By setting up main drive grub to boot the remastered KNOPPIX image, you can test run it by running qemu /dev/sda & and choose the new boot option from grubs menu. There you may also make modifications.
I think this might be a good outline to enlarge upon.
I suggest that some code or pseudo code be added to make more specific what goes on in each step.
I other words, convert this outline into a script or several scripts.
If appropriate capitalize on Werner's style and content.
As an aside, I note that the PCLinuxOS 'mylivecd' approach uses bleachbit as a clean-up step
to remove unnecessary leftovers in the remastering process. Does that have any part in this
procedure? Should it?
Last edited by utu; 08-09-2011 at 04:42 PM.
-
In your original post, I think
Code:
# mkdir -p /lots_of_free_space/source/KNOPPIX
# mkdir -p /lots_of_free_space/master/KNOPPIX
# cd  /lots_of_free_space/source/KNOPPIX
# cp -a /dev .
# cp -a /UNIONFS/bin .
...
can do the job, to really purge the "hidden" packages. But the whole procedure you described to get at least a new and small ISO, seems to be very complicated and not for an inexperienced user.
By the other way, if you first remaster, then purging all not needed packages and the lots of dependencies will be done automatically by "aptitude".
In the scripts of Forester I cannot find a hint, how to purge "hidden" packages by building a new ISO. Perhaps I didn't searched for it enough.
-
Well now Im totally lost! The link I followed previously for remaster didnt work. The ISO wasnt created in a useable state. The ISO was 11Mb and seemed to be a corrupt file.
... which link for remaster did you follow? Be aware, I did the revised version of Remaster Howto in the middle of June. If you used old parts of this HowTo, then remaster will not work.
By the way, to remaster a Knoppix DVD isn't a good idea; the DVD is to big for remastering purpose. Make a Flash disk Installation of the DVD and use the persistent memory only for some little modifications and especialy for your user files.
Per statement from Schulz, "... you can combine: 1. remaster Knoppix 2. "Flash disk Installation"
of remastered Knoppix" So which is it?
Take care of this order!
Greetings Werner * http://www.wp-schulz.de/knoppix/summary.html
Own Rescue-CD with Knoppix (Knoppix V6.7.0 remaster)
-
Senior Member
registered user

Originally Posted by
Werner P. Schulz

In the scripts of Forester I cannot find a hint, how to purge "hidden" packages by building a new ISO. Perhaps I didn't searched for it enough.
I thought everything is in his post #11 where he has already provided a script for it ?
Purging is encapsulated and granted. As long as one takes the files from /UNIONFS and send it to mkisofs, you don't have to worry about wiped-out files, the aufs handles it.
Actually, for the purpose of creating a new ISO from installed flash installation, it is a matter of ***ONE*** script ( as long as the needed space and virtual memory/swap space requirement are met ). As you said, synaptics (plus aufs) handles it already.
 Posting Permissions
- You may not post new threads
- You may not post replies
- You may not post attachments
- You may not edit your posts
-
Forum Rules

ASUS H110M-R Motherboard Intel 6th/7th Gen LGA1151 DDR4 Micro-ATX i/o shield
$42.00
***NEW*** BCM RX67Q mATX Gaming Motherboard Combo | Intel i5-3470 | 16GB DDR3
$49.77
Micro ATX Desktop Motherboard ASUS H110M-C LGA 1151
$31.95
ASUS Prime Z390-A LGA 1151 Intel Z390 SATA USB 3.1 ATX Motherboard NO I/O
$99.00
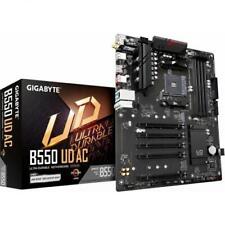
Gigabyte AMD B550 UD AC Gaming Motherboard - AMD B550 Chipset - AM4 Socket - AMD
$89.99
Asrock Z390 Phantom Gaming 4S/AC Wifi 8th/9th Gen Intel 1151 Motherboard Bulk
$47.35
MSI B450M PRO-VDH MAX AM4 AMD B450 USB3.2 Micro-ATX Motherboard
$67.99
ASUS H110M-C LGA 1151 Micro ATX Motherboard 8GB RAM No CPU
$39.99
ASUS PRIME Z690-P WIFI D4 ATX Motherboard Intel LGA1700 DDR4 HDMI
$99.99
GIGABYTE MB10-Datto Motherboard Xeon D-1521- SR2DF 2.40 GHz- Open Box
$121.50


 Reply With Quote


