-
Senior Member
registered user
Partitioning and cfdisk how-to and how to ungoof your MBR
Of course we first need to get the standard disclaimer out of the way: If you through the use of this document bork your hardware, software, dog, girlfriends goldfish or otherwise don't come crying to me! As always- BACK UP YOUR DATA FIRST!! Especially if you're considering repartitioning your hard drive.
Also- this really belongs in the wiki but since I don't have time, patience or otherwise it would be fantastic if some kind soul could take the time to put it there.
On with the show...........
There is no great science to disc partitioning. A hard drive is actually two discs, one above the other with a gap of apporximately 1/4" seperating them. The 'heads' are little arms that move across all four disc surfaces from outer edge to inner edge and back. They write data to and read data from the disc in 'blocks'. Of course it's a little more complicated than that but that's enough for our intent. When you install windows it automatically makes a partition the size of the entire first hard drive and also formats the drive. Back when a big hard drive was less than 1 gigabyte that was ok- now they are comparatively huge and we can make much better use of disc space by partitioning.
When you partition the disc you are dividing it into sections. Remember how vinyl LP's look? Cmon' now I know I'm not the only one who remembers LP's!  You could see where each song started and stopped. This is much the same as hard drive partitions except that we must use a graphical representation of the partitions since we cannot physically see the partitions. For all practical intents and purposes you may think of partitions as seperate discs in and of themselves. They will be used as such. There are any number of partitioning programs out there. They all do the same thing. Some are easier than others. I would recommend using qtparted as it is a very easy to understand proram that graphically represents how your disc is partitioned and it is included with Knoppix.
*NOTE*I have heard all sorts of stories about working w/ NTFS from Linux ranging from good to bad. Beware.
Open a root terminal and do this:
qtparted
OR- open any terminal and do this:
sudo qtparted
This should open up qtparted. Go ahead and have a look- you won't hurt anything (just don't 'write' anything). It should show you all of your hard drives and how they are partitioned.
*NOTE* There is still some question as to whether or not qtparted will work for resizing Reiser formatted partitions.
There are several ways that Linux refers to drives. Fortunately this is slowly changing to one standard format called the device file system but we aren't there yet. Your drives are usually referred to like this:
Primary Master- /dev/hda
Primary Slave- /dev/hdb
Secondary Master- /dev/hdc
Secondary Slave- /dev/hdd
Your first drive /dev/hda is usually a hard drive (except for diskless machines!). It is where the Master Boot Record is stored. The MBR contains quite a bit of info- specifically your bootloader which actually has two stages- primary and secondary. The primary bootloader does nothing more than start the secondary boot loader. The secondary boot loader boots the partition with your operating system on it. If you only have one bootable partition then that's fairly straightforward. However, if you wish to dual-boot then you will need a menu from which you can choose the partition you'd like to boot. While ntldr is capable of this it is not very user friendly to configure. LILO and GRUB (the most common Linux bootloaders) while functionally quite different from each other are both fairly easy to configure once you understand the basics-that is another how-to though.
Partitioning:
Each individual partition is numbered. First the disc name '/dev/hda' then the partition number '1,2,3' etc. This gives you /dev/hda1, (first hard drive first partition) /dev/hda2, etc. Another example: /dev/hdc5 (3rd drive 5th partition).
The first four partitions of each disc are usually Primary partitions. Partitions 5-? are usually logical partitions. You could for example create two primary partitions. The first partition ( /dev/hda1 for example) does not need to be very large. 50Mb should do it. It will be a primary partition. Partition number two /dev/hda2
can be any size you wish. Let's say we use the rest of the disc for this partition. We'll assume a total disc of 5000Mb (5Gigabytes) total space. /dev/hda2 will then be approx. 4950Mb (remember that the sizes won't be exact).
*NOTE* Hopefully this does not confuse matters for you. If you only have two partitions, both will be primary. If you then create logical drives or extended partitions inside of partition #2 that partition will then change from #2 to #4. Why? Because partition #4 is the one that is usually used for logical drives.
Logical Drives (extended partitions).
Inside of /dev/hda2 (our second partition on the first hard drive) we will now create two Logical Drives. They will begin with?..../dev/hda5, dev/hda6, etc. Why? See the above paragraphs. You can make them any size you want as long as they fit inside the primary partition. Lets make our first logical drive 3000Mb. This is where we will install the /root directory.
The second logical drive we will make 500Mb. This will be our swap partition.
The 3rd logical drive we will make 1500Mb. This one could be used for our /home partition (refer to the Knoppix docs for a how-to on moving your /home partition).
I personally prefer to use cfdisk to view, create and delete partitions. It is also used during the Knoppix install script so if you intend to install Knoppix it might be a good idea to familiarize yourself with cfdisk.
You may use the above examples and sizes for a Knoppix hd-install. They should work just fine.
Here is another example of a partitioned 20G drive:
#: cfdisk /dev/hda
Code:
cfdisk 2.11z

Disk Drive: /dev/hda
Size: 20490559488 bytes, 20.4 GB
Heads: 255 Sectors per Track: 63 Cylinders: 2491

Name    Flags    Part    Type    FS    Type    [Label]    Size    (MB


hda1 Boot Primary Linux ext2 65.81
hda5 Logical Linux ReiserFS 1003.49
hda6 Logical Linux swap 1497.01
hda7 Logical Linux ReiserFS 1998.75
hda8 Logical Linux ReiserFS 1998.75
hda9 Logical Linux ReiserFS 3002.23
hda10 Logical Linux ReiserFS 3002.23
hda11 Logical Linux ReiserFS 5872.85

[Bootable] [ Delete ] [ Help ] [Maximize] [ Print ]
[ Quit ] [ Type ] [ Units ] [ Write ]
Use the arrow keys to navigate through cfdisk. The options at the bottom are fairly self-explainatory but I'll give a brief description of each one:
[Bootable]- marks a partition as 'bootable'. Note that only the first partition needs to be labeled as bootable IF YOUR BIOS CANNOT BOOT FROM BEYOND THE 1024 CYLINDER LIMIT OR YOU ARE USING NTLDR.
[Delete]- just as it implies it will delete- without question any partition you choose.
[Help]- take a guess.
[Maximize]- An option to maximize the usage of the partition. You will likely never need to use this option.
[Print]Not literally "send to printer" but print to file OR- for those of you that are curious print to screen-you can even choose the format. The following is [Print] [Sectors] to screen.
Code:
Partition Table for /dev/hda

First Last
# Type Sector Sector Offset Length Filesystem Type (ID) Flags
-- ------- -------- --------- ------ --------- ---------------------- ---------
1 Primary 0 128519 63 128520 Linux (83) Boot (80)
2 Primary 128520 4128704 0 4000185 Linux (83) None (00)
4 Primary 4128705 40017914 0 35889210 Extended (05) None (00)
5 Logical 4128705 6088634 63 1959930 Linux (83) None (00)
6 Logical 6088635 9012464 63 2923830 Linux swap (82) None (00)
7 Logical 9012465 12916259 63 3903795 Linux (83) None (00)
8 Logical 12916260 16820054 63 3903795 Linux (83) None (00)
9 Logical 16820055 22683779 63 5863725 Linux (83) None (00)
10 Logical 22683780 28547504 63 5863725 Linux (83) None (00)
11 Logical 28547505 40017914 63 11470410 Linux (83) None (00)
[Quit]Just as it implies.
[Type]With this option you can MARK any partition as a certain format type. THIS DOES NOT FORMAT THE PARTITION!! That is a seperate process to be completed later AFTER writing your partition table AND confirming the re-read of your partition table which may involve a reboot.
[Units]Changes the format which your partitions are displayed. Your choices are Megabytes, Sectors or Cylinders. Stick with Megabytes unless you know what you are doing. It's much simpler.
*NOTE* A Megabyte is 1024 Kilobytes. Therefor, in the above example /dev/hda10 is 3000 Mb OR 3Gigabytes.
[Write]- Commits your new partition table to the hard drive.
*REMEMBER* If you do not [Write] the partition table to disc nothing will be changed. When you do invoke the [Write] option cfdisk will tell you if it wrote successfully or not and if it succeeded in re-reading the partition table AFTER writing. If it fails to re-read the table you will need to reboot for the changes to take effect. If it successfully re-reads the partition table you should not need to reboot but if it makes you feel better by all means go ahead.
So what are you waiting for? Go ahead, start cfdisk, create and destroy partitions at will- JUST DON'T WRITE ANYTHING! and you'll be fine-just [Quit] cfdisk. Learn your way around the program, what it can and cannot do and how it does it. When you're happy with your partitions you've created then go a head and write the partition table to disc.
*REMEMBER* If cfdisk "failed re-reading partition table" then you MUST reboot before trying to format a partition!!
"I goofed my MBR and now I can't boot windows!"
Two things that are reported to work:
1)Boot w/ win98 boot floppy, at the a: propmt enter:
fdisk /mbr
2)Boot w/ XP or WIN2k cd into recovery mode and run:
fixmbr
Similar Threads
-
By dresac in forum General Support
Replies: 11
Last Post: 05-26-2004, 01:38 AM
-
By Mogiin in forum General Support
Replies: 6
Last Post: 08-26-2003, 07:33 PM
-
By senorian in forum Hdd Install / Debian / Apt
Replies: 6
Last Post: 05-20-2003, 03:38 PM
-
By douglas2 in forum Hdd Install / Debian / Apt
Replies: 1
Last Post: 05-11-2003, 03:15 AM
 Posting Permissions
- You may not post new threads
- You may not post replies
- You may not post attachments
- You may not edit your posts
-
Forum Rules

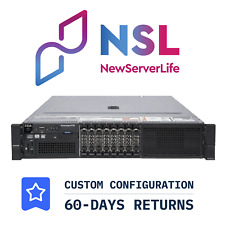
DELL PowerEdge R730 Server 2x E5-2690v4 2.6GHz =28 Cores 128GB H730 4xRJ45
$458.00
HP ProLiant DL380 Gen9 8SFF Server - E5-2698 v3 - 32Cores - 128GB Ram - 1TB HDD
$299.00
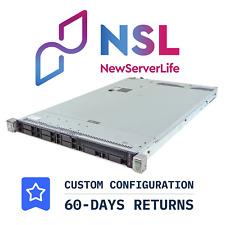
HP ProLiant DL360 Gen9 Server 2x E5-2620v4 2.1GHz =16 Cores 32GB P440AR 4xRJ45
$220.00
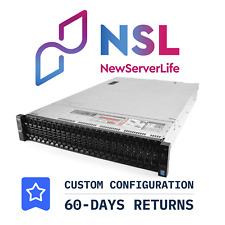
DELL PowerEdge R730XD Server 2x E5-2697v4 2.3GHz =36 Cores 32GB H730 4xRJ45
$378.00
Dell PowerEdge R620 Server 2x E5-2660 v1 2.2GHz 16 Cores 256GB RAM 2x 300GB HDD
$89.99
Dell R630 Server 2x E5-2620 V4 2.1GHz =16 Cores 128GB DDR4 1x 960GB 2x 1G 2x 10G
$210.00
HPE ProLiant DL380 GEN10 G10 Rack Server - 1X Silver 4208 + 32GB RAM 366FLR
$599.99
HP ProLiant DL360 G9 Server 2x Xeon E5-2690 V3 24 Cores 2.6GHz P440ar 128GB DDR4
$249.99
Dell PowerEdge R330 Xeon E3-1220 v5 3.0GHz 32gb H330 2x 3.5" Trays SVR 2012
$189.99
Dell Poweredge R220 Server Xeon E3-1270 v3 3.5ghz Quad Core / 16gb / 1x Tray
$139.99
You could see where each song started and stopped. This is much the same as hard drive partitions except that we must use a graphical representation of the partitions since we cannot physically see the partitions. For all practical intents and purposes you may think of partitions as seperate discs in and of themselves. They will be used as such. There are any number of partitioning programs out there. They all do the same thing. Some are easier than others. I would recommend using qtparted as it is a very easy to understand proram that graphically represents how your disc is partitioned and it is included with Knoppix.


 Reply With Quote


