-
Kanotix Harddrive Installation Document
Kanotix Hard Disk Drive Install
Written By KarlosII (Peter Canada) on Feb. 6/04
Section 1: System Specifications:
Kernel 2.4.24 with XFS, forcedeth and device mapper patches
ACPI and DMA enabled by default (can be disabled with acpi=off respectively nodma)
i586 optimization - not for use with older CPUs!
128 MB RAM required, 256 MB RAM recommended
AVM Fritz!Card DSL support
Eagle USB DSL support
KDE 3.1.5
OpenOffice 1.1
GRUB boot loader for CD start - ideal for rescue in command line mode
Section 2: Testing and Booting the CD
Be sure to verify the integrity of the cd, this should be done either in windows using the program crc or in linux using md5sums. This is very important because a lot of problems are caused by bad copies.
1.Determine the md5sum or crc checksum number, this is usually found in a file with the the extension of ".md5" or ".crc".
For Example:
KANOTIX-BUG-HUNTER-02-2004.iso.md5
KANOTIX-BUG-HUNTER-02-2004.iso.crc
2.To check the iso image enter either of these commands and compare the numbers accordingly.
For Example:
Windows: "crc KANOTIX-BUG-HUNTER-02-2004.iso" or
Linux: "md5sum KANOTIX-BUG-HUNTER-02-2004.iso"
3.Now that you know the the checksum numbers are the same as each other meaning the cd is a good copy, we will boot the cd by putting the cd in the drive and rebooting the system, be sure to make sure the your system is set to boot the cd first in your bios. Some systems may require a boot disk that will boot the cdrom. Use www.google.com to search for a boot disk if you need one.
4.Once you are at the Grub Boot prompt, select the type of kanotix that works best for you to load. There are cheat codes you can use by editing the boot parameter, but for the most part those listed options work for everyone. Now hit enter and kanotix will load up as a livecd. It is recommended you select the option containing alsa for best results with sound.
Section 3: Configuring and Installing Kanotix to the Hard Disk Drive
1.Open a konsole window, there is a also a little window with white border and black inside on your toolbar too which is a link to konsole.
2.At the prompt type "sudo knoppix-installer", yes again this is based on knoppix.
3.Your hard disk drive should have been partitioned and if so desired a swap partition created. I'm not going to cover this right now. Maybe when I modify the this documentation later.
4.Select "Configure Installation", and hit "Enter".
5.Now you will have the option of installing kanotix to the partition you want to install it to. It is recommended that you install it on a partition with at least 4 gigs of space to allow for growth, however 3 gigs is the bare minimum. The selection will look like "/dev/hdaX" where X is the partition number usually 1 or greater. Select that partition and Hit "Enter".
6.Now you will be at a prompt that says "Input your whole name (name surname)", Enter your First name and your last name here, and hit "Enter".
7.Now you will be at a prompt that says "Input your username (perhaps you like xxxxxx)", it will offer a username suggestions based on the first two letters of your first name and and your last name tacked on. Enter the username you want and hit "Enter".
8.You will be asked to enter a password for this username twice, enter the same one twice using tab to move to the next one and hit "Enter" after the last one.
9.Here you are asked for a administration password, this will be your root password. Do the same as the last step, but instead enter a different password if you like which is recommended.
10.Next you will see "Input your preferred hostname", this is the name your computer will be identified by other computers by if you wish to share a linux or windows network. Enter a name here, and hit "Enter".
11.Next you will be asked "Choose where the boot loader (lilo) shall be installed. Select "mbr: master boot record", and select "Next".
12.Next you will be asked to "Choose System Type", there are two options here, we will use DEBIAN Style. Select "Next". Knoppix is like Kanotix livecd on hdd, it is highly unlikely you wish to select this.
13.Now you are done the Configuration part of the installer. (Your almost done!)
14.Now select "Start Installation", and select "Ok". The installation will start and will take between 10 to 30 minutes maximum depending on your system.
15.You will be asked if you wish to create a lilo boot disk, I recommend you do so. So insert a disk and select "yes"
16.It should end off saying "Knoppix successfully installed". Please note you that may see the progress bar display weird stuff, this is just a problem with the display. You may also see and error about unable to copy something to do with office, I dunno why this occurs, however office seems to work fine.
17. YOUR DONE, Enjoy!
Troubleshooting FAQ:
1.On booting the kanotix livecd, the system stalls after the apm or acpi message, no further text.
Solution:
Enable USB Device Function in BIOS
2.After getting to the "Autoconfiguring" at about 2 Green Blocks, my system stalls.
Solution:
Versions of Kanotix earlier then Kanotix-Bug-Hunter-02 do not have SMP support in the kernel. The kernel needs to have SMP enabled in order for the system to boot.
3.You can't write on NTFS partitions - because the Linux support for writing is dangerous. For FAT partitions you can enable write-access with the context menu (right mouse button). You may not have the rights to modify Linux partitions, use the root mode in konsole if needed. Some links are not working in the menu - That is not my fault - The packages from Debian/sid are very new and may have some little bugs, but you can always use new releases. If you find other bugs feel free to post them in the forums at kanotix.mipooh.net.
4.Captive support directly with LiveCD
====================================
Everything must be done as root:
# su
Mount the Windows XP Partition:
# mount /mnt/hda1
Prepare the install - only for LiveCD:
# prepare-captive-live.sh
Fetch driver - if there is no Win XP on HD then with a download of about 30 MB size:
# captive-install-acquire
Umount Windows (very important!):
# umount /mnt/hda1
Mount it with captive:
# mount -t captive-ntfs /dev/hda1 /mnt/hda1
Now it is possible to read and write on that partition as root!
Note:
Instead of using captive-install-aquire it is possible to add manually the 4 needed files. I.e. save them onto 2 floppy disks or USB stick, then copy them manually:
# cd /var/lib/captive/
Copy these files to it:
cdfs.sys
fastfat.sys
ntfs.sys
ntoskrnl.exe
That does the same as using the installer.
5.You can also obtain further help through Internet Relay Chat (IRC) server: irc.freenode.net channel: #kanotix or #knoppix.
Written By: KarlosII (Peter Canada) on Febuary 6,2004
-
need help using QTParted
I would appreciate help on partitioning in KNOPPIX. I recently gave a try to install 3.6 to HD. 3.4 was not a problem, 3.6 is. I need to know if I should create a partition prior to using QTParted, if so, how? On the install screen I get a window asking me to choose the partition to install knoppix and I am using a new unpartitioned HD. When I get to QTParted I get confused. It asks me for a file system type. I get lost here because I keep thinking of slices like the '/' or root file system and I find no window to let me partition in that sense. Before I install KNOPPIX I need to know that I have a partitioning scheme there. QTParted leaves me in a daze.
I also tried cfdisk but got no initialization screen to initialize my swap. It just exited out after writing to disk and quitting! I never got this in 3.4. It did suggest that I should reboot which I did not.
The most important part of your help on installation was not included. The most important Of all (P).
I also plan on installing Kanotix so any information you can help me with pertaining to partitioning in KNOPPIX would be helpful. I need no help on partitioning in general. Only info as applied to this OS.
tHANKS--
-
Junior Member
registered user
You should start thinking of partitioning yuor HD and installing a Linux distro as two separate tasks. The fact that Knoppix offers to you the choice to partition just before you launch your installation is meant as a matter of comfort.
I don't know QTParted since I never used it (just used to working with fdisk), but IMHO what would best to you is partitioning your HD before installing Knoppix (and/or Kanotix, that's quite the same as for this). You can use either a Windows tool, or a Linux one: take care only of its ability to manage Linux partitions.
You say you're perplexed with cfdisk warning you with a need for a reboot, but it's right: if you don't write changes to disk, and you don't read them when you're formatting partitions, you could have serious troubles with installation (you could even  ruin your existing ones).
My advice: think over your desired disk configuration before acting it. Make it real only when you've made up your mind, take it easy and, if and only if it went smooth, proceed with your Knoppix/Kanotix installation, aware of having your partitions quite ready for use.
And, for heaven's sake, make backups! 
-
installed Kanotix to HD
I decided to reboot after using cfdisk and the install went OK. I'm not used to cfdisk not prompting me to initialized the partitions and am concerned if my swap partition took. When I issued the 'free'command , I saw 'swap 0 0 0'. In 'cat /etc/fstab' I see no swap mounted. At least the software installed. I decided to go to QTParted during the install to see what cfdisk gave me, but it only recognized a prior FAT32 partition and stated on the term window 'unable to align partition properly...generated an incorrect partition table,because it didn't have the correct BIOS geometry. ????
I can see that one cannot trust cfdisk in giving a correct partition table. I have a 40 gig drive and it tells me that I have a 41 gig drive . I may run into problems later.
My question is where in the installation does one get to create /usr; /var etc partitions. I picked the reiser file system so maybe it does not need a '/usr' slice.
Knoppix/kanotix and the rest of these Debian like OS need to have a better install procedure.
my screenshot with the latest Flash working on my website and xmms-kjofol plugin for xmms enabled:
http://users.lmi.net/subjazz/unix/knotix.jpg
Similar Threads
-
By fingers99 in forum Hdd Install / Debian / Apt
Replies: 0
Last Post: 04-18-2005, 10:08 PM
-
By proto in forum General Support
Replies: 0
Last Post: 03-15-2004, 12:30 AM
-
By proto in forum Hdd Install / Debian / Apt
Replies: 1
Last Post: 03-14-2004, 02:26 PM
-
By ssrobzoom in forum General Support
Replies: 1
Last Post: 06-18-2003, 08:34 PM
-
By ktheking in forum Ideas
Replies: 1
Last Post: 04-05-2003, 08:00 PM
 Posting Permissions
- You may not post new threads
- You may not post replies
- You may not post attachments
- You may not edit your posts
-
Forum Rules

Dell PowerEdge R630 8SFF 2.6Ghz 20-Core 128GB Mem 2x10G+2x1G NIC 2x750W PSU
$399.04
Intel XEON E5-2699 V3 CPU PROCESSOR 18 CORE 2.30GHZ 45MB L3 CACHE 145W SR1XD
$45.00
Dell PowerEdge R740XD Server | 2x Gold 6140 36 Cores | H730 | Choose RAM/ Drives
$2800.00
Dell PowerEdge R740XD Server | 2x Gold 6140 | 128GB | H730P | 8x 3.5" HDD Tray
$2589.00
Intel SR2JT Xeon E5-2683 v4 2.10GHz 16-Core CPU Processor
$21.96
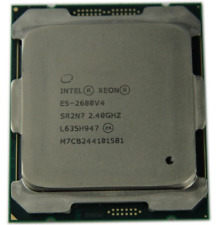
Intel Xeon E5-2680 v4 2.4GHz 35MB 14-Core 120W LGA2011-3 SR2N7
$17.99
Intel Xeon Gold 6140 SR3AX 2.3GHz 18-Core Processor CPU
$39.99
Intel Xeon E5-2699v4 SR2JS 2.2GHz 22-Core 55MB 145W Server Processor CPU
$144.95
Dell Precision Tower 7910 | 2x Intel Xeon E5-2643 V3 | 32GB RAM | No HDD | No OS
$179.95
HP Workstation Z640 2x Xeon E5-2623V4 32GB Ram Dual 256GB SSD K420 Linux GA
$234.98


 Reply With Quote