-
Senior Member
registered user
New KNOPPIX remastering HOWTO
update : this version is now maintained at http://www.knoppix.net/docs/index.ph...masteringHowto so use that version instead of this
This is a guide that will show you howto remaster KNOPPIX.
( notes : commands showen in bold are on one line, so please mazimise the window, if you have any comments/sugestions please post below )
Requirements:
- at least 1.5 Gig of RAM+Swap total
- 3 gig free on a disk
Instructions:
- Boot from Knoppix CD
- Configure your internet connection ( we'll need this later )
- Open a root shell ( Kmenu->Knoppix->Root Shell ) - all commands below are ru
n from root shell - Make 2 directories, one for your new Master CD, one for the source, on a dis
k partition. You'll have to m - Make 2 directories, one for your new Master CD, one for the source, on a dis
k partition. You'll have to make sure these are mounted read-write. If say, you
have a partition with 3 gig free, mounted read-write /mnt/hda4, then mkdir /
mnt/hda4/knxmaster; mkdir /mnt/hda4/knxsource - mkdir /mnt/hda4/knxsource/KNOPPIX ( replace /mnt/hda4 with where your
harddisk is mounted ) - now, copy the KNOPPIX files to your source directory : cp -Rp /KNOPPIX/* /
mnt/hda4/knxsource/KNOPPIX that will take a little while 
- [b]mkdir /mnt/hda4/knxmaster/KNOPPIX
- cp /cdrom/index.html /mnt/hda4/knxmaster/
- now, copy everything in /cdrom/KNOPPIX/ to /mnt/hda4/knxmaster/KNOPPIX/ except the ~700 Mb KNOPPIX file.
- Now you can "chroot" into the copied KNOPPIX : chroot /mnt/hda4/knxsource
/KNOPPIX - new - I get a whole lot of /dev/null permission denied
errors, I'm not sure what thats all about, but I press CTRL+C and carry on anyway...
Update : fixed ! Well, check your mount status if you met the problem:
# mount
/dev/hda12 on /mnt/hda12 type ext3 (rw,nosuid,nodev)
where "nodev" means that you are not accessible on mounted filesystem
and you can not access /dev/null. And some scripts get output redirect
to /dev/null...
To solve this you should mount target partition before you do chroot
like this:
# mount /dev/hda12 /mnt/hda12
And see whats changed:
# mount
/dev/hda12 on /mnt/hda12 type ext3 (rw)
then you can carry on and chroot.
- You are now chrooted. "/" is actually "/mnt/hda4/knxsource/KNOPPIX"
- To use the internet you need to mount proc mount -t proc /proc proc
- now edit /etc/resolv.conf and add your nameserver
- check your chrooted internet connection : ping google.com
- Now you can change stuff. If you want to add programs, you'll probally have
to remove some programs to free up space. apt-get remove <program>
will remove that program. - change stuff.. user settings are in /etc/skel
- ...
- Unmount /proc - very imporntant! umount /proc
- Press CTRL+D to leave being chrooted.
Notes :
interesting stuff in /etc/init.d/knoppix-autoconfig :
The X background file is /cdrom/KNOPPIX/background.gif
As well as floppyconfig, there is cdromconfig which will run /cdrom/KNOPPIX/knoppix.sh
interesting stuff in /etc/init.d/xsession
it ALSO sets background as /usr/local/lib/knoppix.gif
Now, onto creating the ISO file
- we've finished customizing and ready to burn!
- first do some cleanup : remove .bash_history files, tmp files etc
- rm -rf /mnt/hda4/knxsource/KNOPPIX/.rr_moved
- Now we'll make the big KNOPPIX file which is a cloop compressed ISO 9660 filesystem : mkisofs -R -U -V "KNOPPIX.net filesystem" -P "KNOPPIX www.knoppix.net" -hide-rr-moved -cache-inodes -no-bak -pad /mnt/hda4/knxsource/KNOPPIX | nice -5 /usr/bin/create_compressed_fs - 65536 > /mnt/hda4/knxmaster/KNOPPIX/KNOPPIX
- if all went well, onto making the final CD-ROM Image :
- cd /mnt/hda2/knxmaster
- mkisofs -pad -l -r -J -v -V "KNOPPIX" -b KNOPPIX/boot.img -c KNOPPIX/boot.cat -hide-rr-moved -o /some/where/knoppix.iso /mnt/hda2/knxmaster ( replace /some/where/ with where you want to store the final image ready for burning. )
- all done!
Thats it. This is an updated version of my previous howto. This is not meant for linux beginers, you will need to know your way around linux... to get this to work. I'll update this as corrections/improvemtns/etc come through.
Thanks to aay for some corrections
Similar Threads
-
By PrOCesSkIlL in forum Customising & Remastering
Replies: 29
Last Post: 04-02-2004, 01:32 AM
-
By Alexxx in forum Customising & Remastering
Replies: 3
Last Post: 02-24-2004, 08:02 PM
-
By hanx in forum Customising & Remastering
Replies: 1
Last Post: 09-02-2003, 05:31 AM
-
By MichielioZ in forum Customising & Remastering
Replies: 11
Last Post: 04-15-2003, 12:13 AM
-
By Robert Michel in forum Ideas
Replies: 7
Last Post: 03-06-2003, 11:33 PM
 Posting Permissions
- You may not post new threads
- You may not post replies
- You may not post attachments
- You may not edit your posts
-
Forum Rules

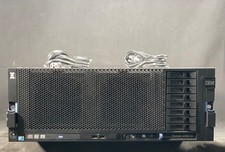
IBM System X3850-X5 Server w/4x Intel Xeon E7-4870 CPU , 512 GB DDR3 RAM,NO HDD
$1599.99

IBM 9307-RC4 42U 19in Freestanding Server Rack Cabinet 1000 lb Capacity
$100.00
IBM QRadar xx29 2x Xeon E5-2650v4 2x 900W PSU M5120 12x 3.5" Bay Server No RAM
$179.99
IBM 7915 AC1 M4 E27R704 Server Intel 2650V2 32GB RAM NO HDD w/ 2x 750w PSU
$225.00
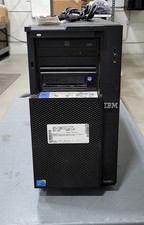
IBM SYSTEM X3500 M3 SERVER 7380AC1 TOWER Server XEON E5620 8GB RAID SEE NOTES
$111.70

IBM X3650 M5 5462-AC1,2 X E5-2640V3 2.6GHZ 8C, 16 GB, DUAL 750W, 2 X 1TB SERVER
$349.99
IBM x3550 M4 1x 3.50GHz Quad Core Xeon E5-2637v2 32GB RAM 8-Bay No HDDs - READ
$20.00
IBM Power 720 8202-E4B Server - POWER7 4-Core 3GHz, 8GB, 2x 146GB HDD, 1725W PSU
$450.00
IBM X3650 M4 Server System Board 00MX553 00AM209 00Y8499 00Y8457 00D2888 00W2671
$230.00
IBM System x3850 X5 (7145AC1) Server w/ 2x Xeon X760, 32GB +Storage, 2x PSU
$299.99



 Reply With Quote