-
HOWTO: Converting your minirt.gz from initRD to initRAMFS
HOWTO: Converting your minirt.gz from initRD to initRAMFS
Change Log:
* Version 1.3 - Mon Aug 21, 2006
Spelling corrections (Linuxgamer)
* Version 1.2 - Thu Feb 23, 2006
Ammended some grammar.
* Version 1.1 - Tue Nov 29, 2005
A little bit of clarification and restructuring.
* Version 1.0 - Tue Nov 28, 2005
Initial write
Disclaimer:
Always needed cause you just never know how people will interpret things. Please people, use this at your own risk. Whilst this method has and continues to work for me, I will not be held responsible for anything that might go wrong, due to an ommision or typo in this document. I too, like you, am human and do make mistakes.
initRD vs initRAMFS:
initRAMFS is, as it's described in the kernel documentation, 'a chunk of code that unpacks the compressed cpio image midway through the kernel boot process.' The files contained within that image are then used to populate the root filesystem. Initramfs is a part of a bigger concept called 'early-userspace'. It's described in detail in <kernel-sources>/Documentation/early-userspace/. The general idea is "if it can be kept out of the kernel, let it stay that way".
I'm not going into any huge debate about the pros and cons of these two but one thing I will mention is that initRD is old generation and there are plans to supersede it. "With what?" you ask. Currently there are two options being looked at that I know of, one is yaird (name speaks for itself) and the other is initramfs (which I will be talking about here). If you want to know more try Google but for now there is a Debian comparison available at http://wiki.debian.org/InitrdReplacementOptions
With initramfs you'll not notice any significant differences, in fact if you install it correctly, you should not notice any changes.
Why?
Simple really, firstly I was tired of upgrading the kernel and replacing the unionfs.ko module with the latest revision and getting all those out of space errors becuase it was to big to fit in minirt. Secondly, I've added the fbsplash patch, to to my distro and to get the live splash screen working required an initramfs image.
Another benefit that comes out of it for me, is that I can edit my miniroot image at any time, and rebuild it with one line of code. There is no immediate size limitations and i'm all for making things easier and simpler.
What are we going to replace/upgrade:
From my experience, in short, the steps are:
For the compressed filesystem (ie chroot environment, /source)
1. Extract and mount the initrd miniroot
2. Copy the files from the initrd to an initramfs working directory
3. Add the init script
4. Compress the initramfs miniroot
Easy, huh ... let's get our fingers dirty.
Extract and mount the miniroot
Code:
# cd /path/to/working/directory
# mkdir miniroot-initrd
# cp /path/to/minirt.gz .
# gunzip minirt.gz
# mount -o loop minirt miniroot-initrd
Setup our initramfs working directory, copy and clean up
Code:
# mkdir miniroot-initramfs
# cp -Rp miniroot-initrd/* miniroot-initramfs/
# umount ./miniroot-initrd
# rmdir ./miniroot-initrd
Ensure initramfs requirements are met with init
Code:
# cd miniroot-initramfs
# touch init
# chmod +x init
# vi init
Note we are creating an init file in the root directory of the miniroot image. Unlike an initRD image that looks for /linuxrc an initRAMFS image looks for /init
Add the following text and save
Code:
#!/static/ash
/linuxrc
exec /etc/init "$@" </dev/console >/dev/console 2>&1
You'll notice that this init may look like the same one in /etc of your miniroot (alternatively you could move that init file from /etc to /, if it exists that is)
Lastly we need to compress the miniroot environment to the minirt.gz that we know so well
Code:
# find . | cpio --quiet -o -H newc | gzip -9 > ../minirt.gz
# cd ..
And there you have it the one liner that takes your miniroot source tree and generates an initramfs image. Now everytime you have to replace a module or edit the linuxrc script you can just run the last command and get the most recent snapshot of your miniroot working directory. Supoib!!
Closing:
This HOWTO, like my others, will continue to evolve from any constructive feedback received. For now ... use it, abuse it, and let me know what you think.
Similar Threads
-
By tr in forum Customising & Remastering
Replies: 0
Last Post: 04-25-2007, 08:29 PM
-
By turbine in forum General Support
Replies: 2
Last Post: 01-06-2006, 12:57 PM
-
By Sabih in forum Hdd Install / Debian / Apt
Replies: 2
Last Post: 04-28-2005, 10:36 PM
-
By chronictoker420 in forum General Support
Replies: 7
Last Post: 05-02-2004, 11:20 PM
-
By alex52 in forum Hdd Install / Debian / Apt
Replies: 4
Last Post: 02-01-2004, 06:08 AM
 Posting Permissions
- You may not post new threads
- You may not post replies
- You may not post attachments
- You may not edit your posts
-
Forum Rules

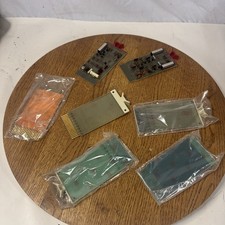
Vintage DEC Digital Equipment Flip-Chip Module Lot Parts
$59.99

Vintage Digital VR241-A color CRT monitor, powers on, DEC Rainbow or terminal
$150.00
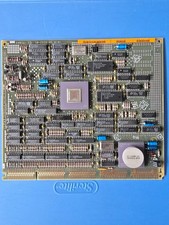
Vintage DEC Digital T1043 DWMBB/B VAXBI XMI Adapter 5018232-01 C1 VAX Board
$109.99
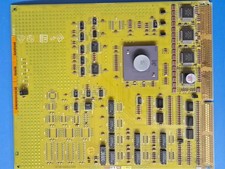
Vintage DEC Digital XMI-A1 5017293-01A1 LWPR BE3-0 VAX Circuit Board T2012
$74.99
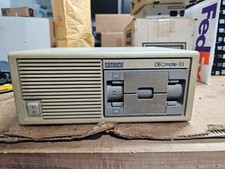
DEC Digital DECmate III PC238 PDP-8 6120 RX50 Dual Floppy Vintage Computer
$649.95
Vintage DEC Digital Equipment DELNI 8-Port Ethernet Local Network Hub VAXstation
$79.95
Rare Vintage DEC DIGITAL DFO3 modem ~Powers Up but UNTESTED #1
$75.00

Vintage DEC LK201 Digital Equipment Corporation (DEC) LK201-AA Computer Keyboard
$149.99
Vintage DEC/Mostek memory systems MK 8015 AA-00 6805-08015 1100 REV C(B7)
$279.99
Vintage DEC Digital Starion 200 Desktop PC Powers On Boots To BIOS NO HDD - DW
$269.99



 Reply With Quote