-
Senior Member
registered user
This is a how to for the new version of clusterKNOPPIX_V3.3-2004-02-16-EN-cl1.iso ~ 538MB in a newbie style.
One of the new features an install to the hard drive for the nodes on a separate partition. This is the image on the cd. I haven't tried adding to this image thru a remaster as my nodes are booted in text mode. I have only used the openmosixterminal server. The terminal server should be the same .
Some of this how to is a merging of some other posts I have written. savin my fingers from my poor typin skills.
Upon booting hit F2 to give yourself time to type in cheat codes. Most machines can benefit from using them. Search the forum or post to get those answers.
I open a root shell(penguin lower left) and type:
We are interested in the first three choices. I do them in the following order.
3.Partition First:
QTparted is a linux version of Partition Magic for windows. Once its running your hard drives are on the left. Choose the one to work on by clicking-on-it. Your partitions are on the right. Right click your partitions to modify. It can even resize a partition without data loss. Don't try this one at home without a back-up. Swap for nodes: more nodes=more swap
A minimum install would be something like:
/hda1 bootable primary root 4 gigs
/hda2 primary nodes 600mb
/hda3 primary swap twice your physical ram minimum
1.Configure Installation:
Name,password,ect goes in here. Most of it is pretty easy. Installing to MBR works for me. One of the last choices is Knoppix style install or Debian. Debian style is more secure, thats my choice. Knoppix style should also work.
2.Start Installation: 15-20 minutes
Check your choices, before happily hitting the start button. It has saved me wasted time...
Before you reboot to your new install, lets copy the cd to the hard drive for the nodes to use. Make sure the partition has been changed to be writable in our example /hda2. Right click on the desk top icon. Mount then change read write mode.
It works to do this after you do the knoppix-installer, while still running the live Cd.
I like running the terminal server from the command line. There is alot more info available and you can see if it hangs somewhere. This next bit is a recycle from another post this should get either a live Cd or hard disk install running. There are some edits to reflect the new version of CK.
Make sure there are no other DHCP servers that are running on this network.
These defaults should work for most people of course change as you see fit. Run as root of course:
Code:
/etc/init.d/knoppix-terminalserver restart
or the openmosix version
Code:
/etc/init.d/knoppix-terminalopenmosixserver restart
Things to do:
Set Static IP
Set-up and start knoppix-terminalopenmosixserver
Re-start OpenMosix
Set-up and monitor nodes/cluster
Here we go:
Set Static IP
Use DHCP broadcast -> No
Please enter IP Address ...
(change to) 192.168.0.254
OK
Please enter Network Mask ...
(default) 255.255.255.0
OK
Please enter Broadcast Address ...
(default)192.168.0.255
OK
Please enter Default Gateway
(default) 192.168.0.254
Please enter Nameservers
(default) 192.186.0.254
The terminal should close in a bit, let it do its work.
You can check your work by opening Knoppix Icon (penguin) -> Root Shell ->
Set-up and start knoppix-terminalopenmosixserver:
Information about the Knoppix Terminal Server -> OK
Setup (Re)configure server and restart -> OK
Choose network device connection->eth0 Netzwerkkarte_0 (default) -> OK
IP Address range for clients(default allows 50 IP address!) -> OK
Here is the new node file system option:
Access the static CDROM:
1. cdrom: If you just want to run the nodes from the cdrom. It will run slower than hard drive install.
2. disk: This would be your regular choice. For now we are going to do # 3.
3. new: create directory for export: OK
choose partition to install to takes about 5-10 minutes.
Client Hardware
You are being asked here info about the nic card in your client/node. This seems to be a show stopper for some people. For more info about your nodes ethernet drivers try booting the node open a terminal and search with:
or
For my nodes it happens to be via-rhine.o "Via Rhine PCI Fast Ethernet driver" Make sure that you get an x in those boxes. This window seems a little flaky at times .
Options
secure -> leave checked unless there is a reason to have root access on all nodes.
textmode ->uncheck This is an important option (some of the magic imho). A complete copy of knoppix operating system will be available to all nodes. For the first few times its worth un-checking this box just to see your node boot-up into a gui, from a network boot. No cd or hardrive necessary.
For regular use if you are the only one using this cluster or only have one monitor or want to save the gui overhead cost on (all) your nodes. ->leave default a x mark in the box.
If you want to have a gui on the (all) nodes. -> uncheck the box
Leave the other check boxes alone for now.->ok
Client boot options(any options that the node might need knoppix cheat codes apply here).
I needed to add the following, your cheats may vary:
knoppix xmodule=vesa
Starting Server
Yes
Your screen output should look something like(this is from a hardrive install):
root@groove:/home/johnb# /etc/init.d/knoppix-terminalopenmosixserver restart
Making Mini Rootdisk.
1+0 records in
1+0 records out
6144000 bytes transferred in 0.020725 seconds (296452034 bytes/sec)
Generating public/private dsa key pair.
Created directory '/root/.ssh'.
Your identification has been saved in /root/.ssh/id_dsa.
Your public key has been saved in /root/.ssh/id_dsa.pub.
The key fingerprint is:
f9:16:b2:51:0e:5e:5f:4f:35:3c:70:19:47:ee:78:ce root@groove
Starting OpenBSD Secure Shell server: sshdcp: cannot stat `/dev/systty': No such file or directory
1+0 records in
1+0 records out
6144000 bytes transferred in 1.109769 seconds (5536288 bytes/sec)
82.1%
Starting DHCP server: dhcpd3.
Starting portmap daemon: portmap.
Starting NFS common utilities: statd.
Exporting directories for NFS kernel daemon...done.
Starting NFS kernel daemon: nfsd mountd.
Starting domain name service: named.
At this point we can reboot and set-up a desktop.
Your terminal will complain about /mfs not being set-up correctly when you do a (/etc/init.d/openmosix restart)
re-start of OpenMosix to check all is well: Skip if you dont want /mfs running.
Code:
/etc/init.d/openmosix restart
(if you are running Quantain it is /etc/init.d/quantian-openmosix restart ).
You should have similar output:
openMosix: Using map file /etc/openmosix.map
openMosix: WARN: Invalid configuration in map-file /etc/openmosix.map
openMosix: Falling back to autodiscovery mode using /usr/sbin/omdiscd
Stopping openMosix...
openMosix: All remote processes were expelled and no further remote processes accepted.
Initializing openMosix...
Local processes already allowed to leave automatically.
automatic load-balancing already enabled.
Remote processes now allowed in.
Heres how to get /mfs working.
edit /etc/fstab from root shell
add the following line at the end hit return and save.
Code:
mfs /mfs mfs dfsa=1 0 0
Do the same with /etc/mtab
Code:
/mfs /mfs mfs rw,dfsa=1 0 0
We are almost ready to boot our nodes we just need to restart the terminal server and the turn on our nodes.
Code:
/etc/init.d/knoppix-terminalopenmosixserver restart
Same as before. Make sure to export partition. that should set-up the master. Try booting the nodes. Hopefully you will see that familiar screen of Knoppix.
To control the cluster:
Let me know how you make out.
johnb
Similar Threads
-
By eris_pluvia in forum Hdd Install / Debian / Apt
Replies: 0
Last Post: 10-19-2004, 03:15 PM
-
By YannLeMerle in forum General Support
Replies: 0
Last Post: 03-07-2004, 04:33 PM
-
By MeSo in forum Networking
Replies: 1
Last Post: 02-17-2004, 02:30 PM
-
By law_student in forum Customising & Remastering
Replies: 12
Last Post: 06-16-2003, 11:52 PM
-
By anibal in forum Hdd Install / Debian / Apt
Replies: 5
Last Post: 06-06-2003, 05:35 PM
 Posting Permissions
- You may not post new threads
- You may not post replies
- You may not post attachments
- You may not edit your posts
-
Forum Rules

Seagate ST6000NM0115 6TB 256MB 7200RPM 3.5" SATA 6.0Gb/s Enterprise Hard Drive
$159.99
Seagate Exos X14 10TB 7200RPM 3.5" SAS 12Gb/s Hard Drive HDD ST10000NM0528
$165.00
Seagate 14TB Exos X14 7200RPM SATA 6Gb/s 256MB 3.5" Enterprise HDD ST14000NM0408
$354.99
Western Digital WD30EFRX 3TB SATA 5400RPM 3.5" Internal NASware HDD Hard Drive
$84.69
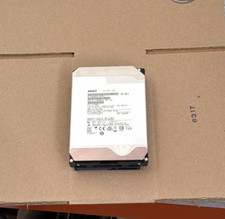
HGST - 6TB - 7200RPM 3.5" SATA 6Gb/s Enterprise Hard Drive | HUS726060ALA640
$84.99
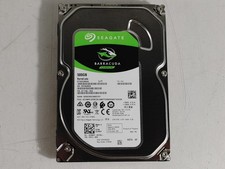
Seagate ST500DM009 BarraCuda 500 GB 3.5" SATA III Desktop Hard Drive
$14.99
HGST 4TB 7200RPM 3.5" SATA 6Gb/s Internal HDD | HDN724040ALE640 0F22408
$75.00
HGST HUS724040ALA640 4TB 7200 RPM SATA 3.5" Internal Desktop Drive 100% Health
$78.00
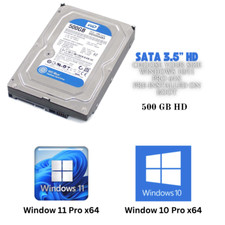
HDD 3.5" SATA Hard Drive with Windows 10/Win 11 64x Installed Legacy
$35.00
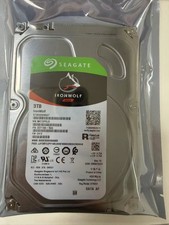
1PCS Seagate IronWolf ST3000VN007 3TB 5900RPM SATA 6Gb/s 3.5 NAS Internal Hard
$97.73



 Reply With Quote