

Hi! I spent several days using the remastering instructions provided herein and experienced many problems. I was able to circumvent these problems eventually and bring up a successfull Live disk. I thought I would document my experience on the chance I can save someone some time.
LiveCD not LiveDVD for DVD
When I first started I looked at the packages on the LiveDVD, such as apache, and began with LiveDVD. However, after much time I hit on the idea of starting with the LiveCD and then just burning a bootable DVD with the image. Looking at the Remastering page you will notice there is no distincion made with the mkisofs command regarding CD vs. DVD. I finally ended up starting with a LiveCD copy and burned the resulting ISO of 1.5GB as a bootable DVD and it worked like a charm.
Reasons for starting with LiveCD vs LiveDVD are as follows:
- * Don't have to delete anything. You have essentially 3GB of compressed space available and then burning a DVD bootable disk.
* Package options. The LiveDVD packages for apache2 and what not were missing crucial modules or components that are installed by default when you use "apt-get install apache2" with LiveCD. In particular, I installed Trac, Subversion and Apache2 and needed them all to work together with WebDAV. They did not. I could not get Trac to browse the Subversion code using the packages preinstalled on LiveDVD.
* Package dependencies. Because the packages on the LiveDVD are missing things, sometimes apt-get would just fail altogether finding dependencies. I started down a rabbit hole of installing from source but eventually failed on that too.
MySQL failed
I naively started with installing mysql 5.0 with apt-get and then took a MySQL dump file and restored my entire database from one SQL script. However, I experienced two failures that required me to install MySQL at boot. 1.) The ".frm" files were not recognized as valid. I kept getting invalid messages. Second, when I just installed MySQL and then initialized the database at boot, the application SQLAlchemy failed. Everything worked in the chroot environment but when I created the ISO and booted, SQLAlchemy couldn't recognize the foreign keys. When I uninstalled MySQL, reinstalled and then restored my database then SQLAlchemy worked.
Following are the actions I had to take to get MySQL 5.0 to work correctly.
- * Install MySQL 5.0 with apt-get
.Code:apt-get install mysql-server-5.0
* Test everything in the chroot directory and make sure everything is hunky dory.
* Copy the mysql script in /etc/initi.d/ to /root:
* Before burning the KNOPPIX/KNOPPIX ISO image, remove and purge MySQL with apt-getCode:/bin/cp /etc/init.d/mysql /root. Note that this will leave the .deb file in the cache so that on any subsequent install you will not need a network:Code:apt-get remove --purge mysql-server-5.0
* Modify the /etc/rc.local script and put the mysql and apache2 as start up scripts:Code:knx/source/KNOPPIX/var/cache/apt/archives/mysql-server-5.0_5.0.51a-24+lenny2_i386.deb
* Modify the /root/mysql script you copied previously. Note that the original was deleted when you removed MySQL. In the sanity_checks function add the code to install MySQL, initialize the database and restore from backup. Below is what I did:Code:SERVICES="cups mysql apache2"
Now your database will install and load on boot. Install MySQL will overwrite the running /etc/init.d/mysql script, which is fine.Code:## Do some sanity checks before even trying to start mysqld. sanity_checks() { if [ ! -x /usr/sbin/mysqld ]; then /bin/rm -f /etc/init.d/mysql echo "mysql-server mysql-server/root_password select YOURPASSWORD" | debconf-set-selections echo "mysql-server mysql-server/root_password_again select YOURPASSWORD" | debconf-set-selections apt-get install mysql-server-5.0 /bin/cp -f /root/mysql /etc/init.d/mysql test -x /usr/sbin/mysqld || exit 0 echo "Install YOURDATABASE tables..." mysql --password=YOURPASSWORD mysql < /root/create_database.sql mysql -u YOURUSER YOURDATABASE < /root/dump.sql invoke-rc.d mysql stop fi
Root '/' directory paths failed
I installed Trac and Subversion root paths at '/' so as to avoid typing:
Before:
I had to move them though because for some reason they were omitted in the ISO. I had to root them under some subdirectory, so I moved them to /usrCode:/trac /svn
After:
Applications installed via apt-getCode:/usr/trac /usr/svn
After I ran apt-get update the following is the list of packages I was able to successfully install using apt-get install:
- * gcc
* flex
* bison
* gdb
* libtool
* m4
* automake
* patch
* autoconf
* emacs22 (emacs23 wanted to install a new version of libc.6, not recommended)
* apache2
* libapache2-mod-python
* python-setuptools (do this before installing trac or trac will fail)
* python-mysqldb
* python2.5-dev (Required to compile Python PIL, see below)
* trac
* subversion
Applications that were installed from source.
- * Python Image Library (PIL) 0.6
* Django 1.0
* SQL Alchemy 0.47
Hope this helps someone!
 Posting Permissions


(New) AMD Ryzen 7 5700X 8 Core 16 Thread AM4 Unlocked 3.4 GHz CPU OEM Tray
$174.99

HP ZBook Firefly 14" G8 Mobile Workstation i5 11th Gen 16GB RAM 256 GB SSD No AC
$184.99

SGIN 17.3" Laptop Intel Quad-Core Up to 2.4 GHZ 8GB RAM 256GB SSD HD
$229.99
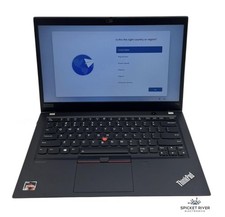
Lenovo ThinkPad T14S Gen 1 8-Core Ryzen 7 Pro 4750U 512GB SSD 16GB RAM FAIR BATT
$225.00
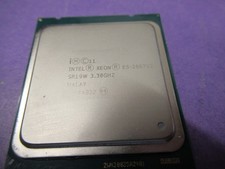
Intel Xeon E5 - 2667V2 / SR19W 3.30GHz 25MB 8-Core CPU Socket LGA2011
$30.00
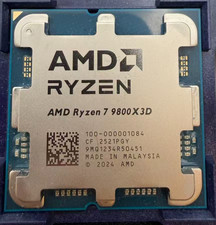
AMD Ryzen 7 9800X3D 8-Core 16-Thread AM5 CPU Processor Brand New Unused
$395.95

AMD FX 8350 8-CORE 4.00GHz CPU FD8350FRW8KHK SOCKET AM3+ *QTY
$39.99

AMD Ryzen 7 9700X 8-Core 16-Thread 40MB Cache Socket AM5 9000 Series Processor
$245.99

Dell T7810 Workstation 8-Core 2.40GHz E5-2630 v3 No RAM GPU HDD OS
$259.98

Home Assistant Server | 8GB RAM | 128GB SSD | Intel i5 Quad-Core | Dell OptiPlex
$159.99


 Reply With Quote