-
USB Remasterig Using Minimum Real Estate
USB remastering traditionally requires lots of temporary file space. More than most people have spare on their USB sticks leading to the temptation to use nfts file space.
I've refined the process and managed to cut the temporary file space down to zero (and speed up the process considerably as a result). The assumption is that you start with a Knoppix image file and a persistent store file and finish with a new pair of files. You need to test the new pair before deleting the old so you need at least enough flash file storage for both but that is all the file storage you need.
The first USB remaster I did comprised four stages:
1. Prepare a new master file system. This is largely a copy of /UNIONFS.
2. Generate an ISO image from the master file sytem
3. Generate a cloop image by compression of the ISO image
4. Copy the cloop image to the USB
The obvious first refinement was to generate the cloop image directly on the USB filesystem.
Most people already combine the second and third stages by using a pipe but I couldn't because I was remastering the DVD MAXI edition and just ran out of (virtual) memory. I suspect somehow you could have enough virtual memory if you ran a 64-bit kernel but even swap space is temporary file space and I didn't want that. Instead I used squashfs that generates a compressed file system in one pass.
Note: you do not need to use squashfs if you remaster the CD edition. You just need a machine with 1 or 2 Gb of RAM.
The final refinement is to avoid creating a complete new master file system. I did this by feeding squashfs a list of directories thus:
Code:
sudo mksquashfs ${dirs} $DST/KNOPPIX/KNOPPIX.sq -b 65536 -noappend
The equivalent for the CD edition might be:
Code:
sudo genisoimage ${options} ${dirs} | sudo create_compressed_fs -B 65536 - $DST/KNOPPIX/KNOPPIX
Repeat: you do not need to use squashfs if you remaster the CD edition.
Which directories are fed to the remastering and which are not ?
I deliberately kept that simple: all directories under /UNIONFS except (possibly) etc, var, home, dev and lost+found.
lost+found should be empty. It isn't wanted anyway so I deleted anything in /UNIONFS/lost+found and then ignored it.
dev isn't really needed except as a back-up in case knoppix-autoconfig goes wrong. It is very small, so I included it in the remastering.
home is my stuff so it is not in the remastering. It stays in knoppix-data.img but needs a tidy up.
var is stuff that changes anyway so there seems little point including it in a remastering of a USB install (CD remaster yes). Unfortunately, it's rather big because I've updated the package lists. I could delete all those but they'd just come back next time I want to install anything. The best I could do was sudo rm /var/cache/apt/archives/*.deb to recover 50 Mb of space in knoppix-data.img.
etc is the difficult one. It contains a lot of files that are put there when packages are installed that I've never been anywhere near. These should go into the remaster. On the other hand there are files that have been changed since installation, many of which contain information about my machines and network, including passwords, that should not go into the remaster.
Really a second level sort is needed. Since etc isn't very big, this could be done in memory using /tmp. However, I decided since etc isn't very big and comprises a lot of little files that probably don't compress and decompress efficiently, I'd keep it out of the remaster and copy all of it into the new knoppix-data.img.
For etc, var and home, I included in the remaster the directory contents from /KNOPPIX so what was on the original DVD is carried forward.
Script ? Of course I have a script. I've remastered twice this way. The whole process, from start to rebooting with a new KNOPPIX.sq and knoppix-data.img takes less than 20 minutes. Not bad.
Last edited by Forester; 03-15-2011 at 12:18 AM.
 Posting Permissions
- You may not post new threads
- You may not post replies
- You may not post attachments
- You may not edit your posts
-
Forum Rules

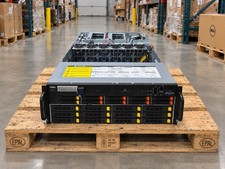
Gigabyte 4U AI Server 10x Nvidia GPU 2x Xeon Gold 6150 36 Core 2.7GHz DDR4 RAM
$1499.00
Dell EMC PowerEdge R440 Xeon silver 4215 2.5GHz 16 GB ram 2x 550W PSU No HDD
$275.00
Dell PowerEdge R240 Intel Xeon E-2224 3.50GHz 8GB DDR4 ECC NO HDD 250W
$285.97
867959-B21 HPE ProLiant DL360 G10 CTO Server W/ 2x 865414-B21 1x 840140-001
$245.00
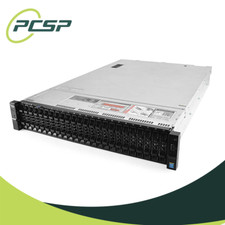
Dell PowerEdge R730XD 28 Core Server 2X Xeon E5-2680 V4 H730 32GB RAM No HDD
$378.93

Dell PowerEdge C4130 1U AI GPU Server | 2x E5-2680 v3 | 32gb Ram | 2x 1600W
$409.99
Dell PowerEdge C4130 1U AI GPU Server | 2x E5-2690 v3 | 64gb Ram | 2x 1600W
$524.99
Dell PowerEdge C4130 1U AI GPU Server | 2x E6-2699 v3 | 128gb RAM | 2x 1600W
$899.99
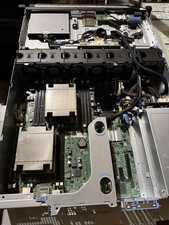
Dell PowerEdge R530 2x E5-2630v4 H330 iDRAC8 Port Card Riser No PSU/RAM/HDD
$99.99
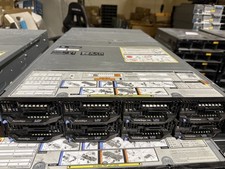
Dell PowerEdge FX2s + 8x FC430 Blades 16x E5-2630v4 160 Cores Rails No PSU/RAM
$699.00



 Reply With Quote