-
USB adsl modem setup with live CD
I've a Knoppix newbie (about 2 weeks experience), but I'm hooked!
One of the first things I wanted to do was connect to the Internet using my USB adsl modem (Fujitsu 310), but it wasn't clear to me how to do this. Tried ADSL configuration on the K-menu, but no joy. Looked around, couldn't find a "how-to" guide for newbies on this. However, I eventually worked it out, so thought that a step-by-step summary for other newbies might be useful. Note that, as a newcomer to Linux, I don't necessarily know _why_ some of these steps are necessary (e.g. "make" then "make install") or even if they _are_ all necessary. But they worked for me! So here goes:
(1) In Windows, download eciadsl-usermode-0.8.tar.gz from eciadsl.flashtux.org
(2) Boot KNOPPIX CD
(3) Create a persistent KNOPPIX home directory (under "configure" in KNOPPIX menu)
(4) Logout KNOPPIX
(5) Reboot KNOPPIX - type "knoppix home=/dev/hda1"
(6) Copy eciadsl-usermode-0.8.tar.gz from your Windows disk to /home/knoppix (i.e. your home directory)
(7) Open a Console window and type "su" to change to root user
(8) Type "passwd" to set root password
(9) Type "tar zxvf eciadsl-usermode-0.8.tar.gz" to extract files from archive
(10) Create a new directory into which the modem-operating files will be written: type "mkdir mymodem" where mymodem is the name of your modem (or any name you choose)
(11) Type "cd eciadsl-usermode-0.8.tar.gz" to change to the directory containing the extracted files
(12) Type "./configure --prefix=/home/knoppix/mymodem" - this step is important, as it ensures that the files generated by the next two steps will be written to your mymodem directory and not to the read-only KNOPPIX file system
(13) Type "make" then "make install" - new directories mymodem/bin and mymodem/doc will have been created
(14) Type "cd .." then "cd mymodem/bin"
(15) Type "./eciconf.sh" to invoke the adsl modem configuration program
(16) Fill in the info pertaining to your modem and ISP account; if you don't know the answers, most of it can be obtained from your Windows adsl modem configration program. In the UK, VPI=0 and VCI=38. Selecting your modem type from the list will complete the VID and PID entries for you. The PPP mode can again be ascertained from your Windows configuration - for me the default VCM_RFC2364 was correct. You can probably leave the "Update provider DNS:" box alone.
(17) Click on "Create config!", then on "Quit"
(18) Make sure that you are root (prompt should start with "root", then type "./startmodem" - all being well, this should connect you to the Internet!
(19) Make sure that you save your KNOPPIX configuration to /mnt/hda1, by using the menu item under "KNOPPIX"
(20) Next time you reboot, type "knoppix home=/dev/hda1 myconf=scan". Once booted, to connect to the Internet again just type "sudo ./fujitsu/bin/startmodem" in a Console window. Tip: if the connection fails, try disconnecting the modem (pull out the USB plug) and try again.
Hope this is useful to someone...
Similar Threads
-
By doesnotcompute in forum Networking
Replies: 5
Last Post: 03-30-2005, 06:18 PM
-
By pathy in forum General Support
Replies: 0
Last Post: 08-07-2004, 02:05 AM
-
By amt in forum Networking
Replies: 0
Last Post: 07-13-2004, 08:51 PM
-
By sirus in forum Hardware & Booting
Replies: 0
Last Post: 06-30-2004, 11:51 PM
-
By satimis in forum Networking
Replies: 2
Last Post: 06-23-2003, 08:08 AM
 Posting Permissions
- You may not post new threads
- You may not post replies
- You may not post attachments
- You may not edit your posts
-
Forum Rules

NEW Cisco Meraki MS130-48P-HW 48-Port Gigabit PoE+ Cloud Manage Switch UNCLAIMED
$2999.99

Cisco WS-C3650-12X48UR-L 48-Port Stackable Layer 3 8x10G SFP+ Port Switch
$129.99
Cisco Acacia DP04QSDD-E25-840 400G QSFP-DD Coherent DCO Transceiver Module
$699.99
Cisco Catalyst C9130AXI-B WiFi 6 802.11ax Wireless Access Point Brand New
$101.99
Cisco Nexus N9K-C92160YC-X 48P 25GbE SFP28 6P QSFP+/QSFP28 PE Switch
$439.00
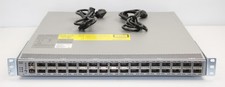
Cisco | N3K-C3232C | 32-Port 100G QSFP Network Switch W/ 2x PSU, 2x Power Cords
$240.00

Cisco C9300-48UXM-A Switch 9300 Series 48-port UPoE Network
$874.99
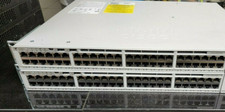
Cisco C9200-48P-E Cisco POE Network Switch
$749.99
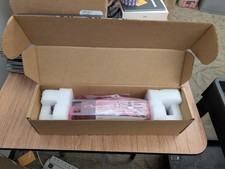
nxa-pac-750w-pe v02 NEW OPEN BOX for Cisco Nexus 9300 Series power supply
$200.00

Cisco XFP-10G-MM-SR 10G XFP Transceiver
$79.89



 Reply With Quote